
ASUSのマザーボードP8Z68-V PROで起動時にネットワークアダプタ(Intel 82579V)が認識されずデバイスマネージャを確認するとエクスクラメーションマーク(!)が付いている状態で通信不可で再起動したりすると認識されて使用できる状態でした。OSはWindows10 Pro 64bitで再起動すればほぼ認識して使えるのですが、毎回となるとやはりうっとうしいので調べてみた結果を紹介します。
ネットワーク不調の解決法
ASUS製マザーボードでIntel 82579Vのネットワークアダプタを搭載した製品でこのような不具合が発生する可能性があるそうです。
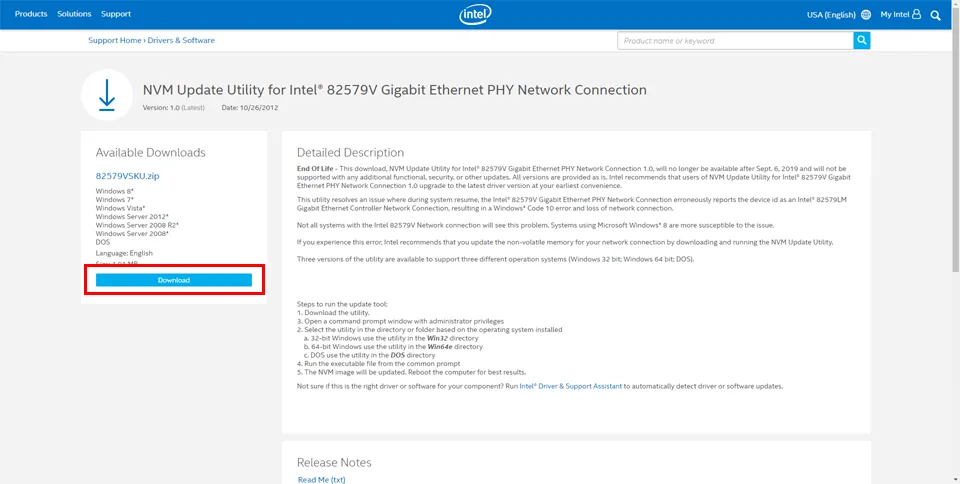
1.NVM Update Utility for Intel® 82579V Gigabit Ethernet PHY Network Connectionを開いてアップデータ(82579VSKU.zip)をダウンロードします。
2.ダウンロードしたアップデータ(82579VSKU.zip)を解凍します。
「DOS」「Win32」「Win64e」の3つのフォルダがあるので環境に合わせたフォルダの中のアップデータを使用します。
今回は64bitのWindows10なので「Win64e」のフォルダを使用します。
32bitのWindowsの場合は「Win32」フォルダを使用します。

82579VSKU.exe Version 1.2.2
Tool to update the NVRAM for the Intelョ 82579V Gigabit Ethernet PHY
Copyright (C) 2012 Intel CorporationThree tools are included, to support three different operation systems (Windows 32 bit; Windows 64 bit; DOS).
Steps to run the update tool:
1. Download the utility from the Intel download center
2. Select the correct tool file name based on the operating system installed
3. Open a command prompt window with administrator privileges
4. Run the executable file from the common prompt
5. The NVM image will be updated. Reboot the computer for best results.Usage: [Tool_file_name] [options]
-log [filename] – generate log info
-report [filename] – generate report file
-nosilent – display the user interfaceExample command line using the Windows* 64 bit operating system:
82579VSKUW64e -nosilent出典:アップデータ同梱のReadme.txt
3.上記Readmeの3.~を実行します。
・コマンドプロンプトを管理者権限で実行します。
・開いたコマンドプロンプトから解凍したファイルを実行します。
64bitOSであればcd Win64eを実行後に、82579VSKUW64e.exe -nosilentを実行します。
・以上でアップデートされたのでコンピュータを再起動します。
以上で終了です。
それでもおかしい場合はネットワークアダプタのドライバをアンインストール後再インストールを試してみると良いです。
コメント